As an Amazon Associate I earn from qualifying purchases.
Decorating cakes with frosting and piping delicate designs is an artform that takes practice. But with the right pastry bags and tips, you can quickly master the techniques for making beautiful cakes at home. This beginner’s guide will teach you everything you need to know about prepping, filling, and using pastry bags to create stunning baked creations.
Why Decorate with Pastry Bags?
Pastry bags and tips allow you to pipe frosting and icing with precision and control compared to using a spatula or knife. They are essential tools for creating beautiful borders, writing, flowers, patterns, and other decorations on cakes, cupcakes, and cookies. With the wide variety of reusable bags and interchangeable tips available today, the possibilities are endless for decorating like a pro!
Decorating with pastry bags allows you to:
- Pipe flawless borders and edges
- Write messages and letters
- Make flowers, leaves, and accents
- Detail patterns like polka dots
- Create textured effects like ruffles
- Apply stripes and geometrics
- Add dimension with layered dots and rosettes
- Achieve sharp lines and consistency in designs
- Switch between tips and colors quickly
Read on to learn all the essential techniques for mastering this fun decorating skill!
Selecting Pastry Bags and Tips
Pastry Bags
The type of pastry bag you use will impact decorating ease and results. Here are the main options:
Disposable bags – Affordable and ideal for beginners. Look for bags with printed guidelines for easier measuring when cutting the tip opening. Disposable bags can only be used once.
Plastic-lined bags – Reusable bags with a plastic lining to make cleanup easier and prevent absorption of color and oils. The plastic lining can split over time.
Canvas bags – Durable reusable cotton canvas bags. Higher quality than plastic-lined bags. Need to be washed properly after each use.
Nylon bags – Reusable bags made of strong, food-safe nylon material. Easy to clean and maintain. A high-end option for frequent bakers.
When selecting a bag, consider the decorating task and your budget. Disposable bags are great for trying new techniques. Reusable canvas or nylon bags are worthwhile investments for avid bakers and can be used with multiple tip types.
Piping Tips
There is a wide selection of metal piping tips available for every decorating need:
- Round tips – All-purpose for dots, writing, and outlines. Varying tip numbers indicate size.
- Star tips – For making stars, shells, rosettes, fleurs-de-lis. Different designs based on serration style.
- Leaf tips – Shaped like leaves with pointy ends. Used to make ribbons, shells, petals, ruffles.
- Basketweave tips – Multiple grooved openings for making woven effects.
- Petal tips – Ruffled, fan-style discs for realistic flowers.
- Grass tips – Tiny openings for fine grass, fur, and hair effects.
- Specialty tips – Unique shapes like floral, calligraphy, lace motifs and more.
Invest in a starter kit with round, star, and leaf tips to begin. Add more specialized tips later as you advance.
Preparing Your Pastry Bag
Properly preparing reusable and disposable pastry bags is the first crucial step for decorating success.
Reusable Canvas or Nylon Bags
Before first use, wash reusable bags in warm soapy water. Rinse and let air dry completely. This removes any residue from manufacturing.
Plastic-lined bags can go right into the washing machine, but canvas should be hand washed to preserve the material. Avoid soaking; dip in sudsy water and spot clean.
Before filling, check for any holes along seams and squeeze the bag to test for leaks. Discard damaged bags, as they will make a mess!
Disposable Pastry Bags
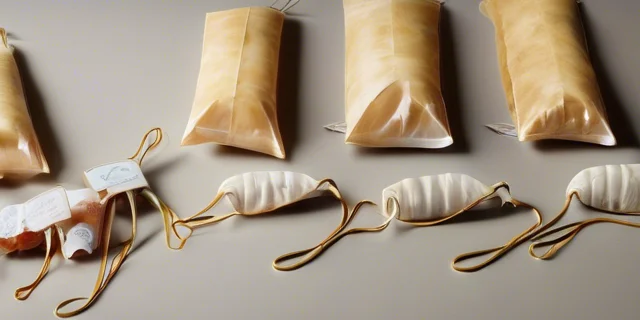
Disposable bags create less waste when you carefully open and cut them for multiple uses. To get started:
- Carefully separate the sealed seams along one corner of the bag.
- Open up the bag fully and push any air pockets out by smoothing it flat.
- Use sharp scissors to cut straight across the wide top of the bag about 1-2 inches down from the upper sealed edge. This gives you room to fill the bag while leaving space to twist the top closed for piping.
- Look for measurement markings on specialty disposable bags to cut for specific tip sizes. A wider cut accommodates larger tips.
- Inspect for holes and discard any faulty bags.
The key is cleanly cutting an opening wide enough to easily fill the bag but narrow enough to keep the twist seal secured. Ragged, uneven cuts will make filling and piping difficult.
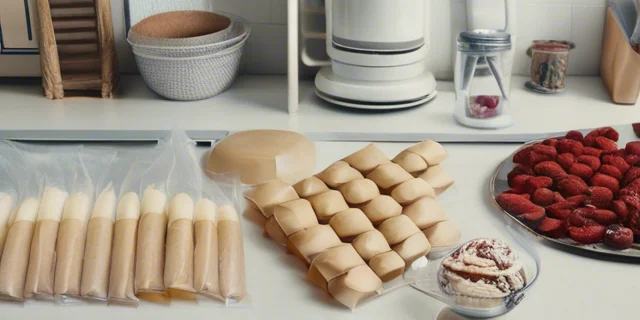
Filling Pastry Bags

Fill Level
Only fill pastry bags halfway to two-thirds full, leaving 3-4 inches empty at the top. This allows you to grip the bag and twist it closed. Overfilled bags are hard to manage and can lead to messy, imprecise piping.
Judge the fill level based on the piping task:
- Smaller bags and finer decorations require less frosting.
- Larger bags for borders and writing need more frosting.
- A 12-inch piping bag should hold 2-2.5 cups frosting maximum.
Technique
Use a spoon or scoop to transfer frosting into the bag. Take care not to overfill. Here are some tips:
- For reusable bags, insert a coupler first then add frosting.
- Place the bag inside a tall glass or cup to keep it open while filling.
- Fold the top over as you fill to support the weight of heavy buttercream or ganache.
- Tap the bag gently on the counter to prevent air pockets.
- If using a tip, place it inside the wide end first before filling halfway up the cone.
- Use a spatula to scrape excess off the sides for a neat look.
Closing the Bag
There are a few options for sealing pastry bags between piping:
- Twist tie: Twist bag 2-3 inches from the top and wrap a twist tie, tin tie or pipe cleaner tightly around the twist.
- Binder clip: Fold over the top and secure with a binder clip for a quick seal.
- Clothespin: Clip upside down over the twisted top to keep it closed.
- Clamp: Special clamps called bag clips available at baking supply stores work well too.
Piping several decorations? Keep extra frosting from drying out by twisting closed and/or clipping between uses.
Piping Techniques for Decorating
Once your pastry bag is prepped and filled, it’s time to start decorating. There are so many piping techniques you can achieve with different tips. Let’s go over some of the most popular.
Getting Started
Before attempting any piping on an actual cake, practice your technique on parchment paper. This allows you to get familiar with applying the right pressure and holding the bag at the proper angle without the mess of ruining a real cake!
To pipe:
- Hold the bag near the twist between your thumb and fingers. Rest the bag on your palm.
- Keep your grip light to allow the frosting to flow and your hand to move steadily.
- Angle the bag vertically with tip 1/4 inch above the surface. This gives you control and precision.
- Apply even pressure with a gentle squeeze as you pipe the design.
- Use your whole arm to move the bag, not just your wrist.
- Keep piping bags refrigerated between uses to keep frosting firm. Let soften briefly for ideal consistency before piping again.
Piping with Round Tips
From polka dots to stripes, round tips can make a variety of decorations.
Dots and Pearls: Touch the round tip straight down and lift back up in one motion. Vary dot size by how long you squeeze the bag. Make polka dots by lining up evenly spaced dots. For dimension, pipe dots in concentric circles.
Writing or Outlines: Gently squeeze the bag while moving the tip along in one continuous motion. Keep a steady hand. Use a round tip to neatly pipe borders along cake edges too.
Quilting: Pipe dots in a circular motion with gentle squeezes while overlapping them slightly. Cover the surface to achieve an all-over quilted texture.
Piping with Star Tips
Add dramatic flair using star tips to create stunning flowers, borders, and accents.
Shells and Rosettes: Pipe a star shape while squeezing the bag gently. Slowly pull the tip inward to complete the shell shape. Make pretty rosettes by centering and overlapping shells.
Fleurs-de-lis: Use a star tip to pipe a star, then add two smaller stars diagonally from the center. Makes a stylized floral shape perfect for borders.
Stars: Choose a small or medium star tip. Hold vertically and pipe stars by squeezing then quickly pulling away while closing the tip.
Piping with Leaf Tips
Leaf tips are ideal for making ribbons, ruffles, and adding texture.
Ribbons: Run the leaf tip along the surface, piping a long strip. Slightly angle the tip left and right for neat edges.
Ruffles: Using a leaf tip, pipe a wavy line on top of itself, building height. For dramatic ruffles, pipe high peaks and deep curves.
Tuxedo Stripes: Alternate piping vertical and horizontal lines with a leaf tip to make a checkered effect.
There are so many more techniques to try – flowers, lace patterns, basketweave, script writing and more. Experiment, practice consistently, and don’t worry about mistakes! The key is to enjoy the process.
Helpful Tips for Beginners
Cake decorating with pastry bags and tips involves a learning curve but becomes more comfortable with regular practice. Keep these tips in mind:
- Practice on parchment first – Hone your skills trouble-free before piping directly on cakes and cookies. No mess clean up!
- Refrigerate iced cakes – Chilled cakes give you more time to decorate without frosting melting or softening. Allow cakes to sit at room temperature 30 minutes before piping for best results.
- Use proper pressure – Don’t under or over squeeze the bag. Find the right pressure for smooth, consistent piping.
- Match tips to tasks – Choose the right tip for the type of decorating needed, whether writing, borders, flowers etc. The tip opening size also matters.
- Work quickly – Pipe fast-melting buttercream quickly before it softens. Have chilled backup buttercream ready to refill bags as needed.
- Steady your hands – Rest your piping hand on the table for stability if needed. Or, grip the bag handle for maximum control.
- Only fill halfway – Don’t overpack bags or you won’t be able to pipe decorations neatly. Leave room to twist the top.
- Take classes – Many bakeries and cake supply stores offer decorating classes for beginners. Watch videos to learn.
- Invest in quality bags and tips – Reusable nylon bags and sturdy metal tips are worth the cost for avid bakers and will last for years.
Most importantly, enjoy the process and don’t expect perfection right away. Relax, have fun, and let your creativity shine!
Cleaning and Storing Pastry Bags
Proper cleaning and storage ensures your reusable pastry bags and tips last and provide years of service. Here are some tips:
Canvas Pastry Bags
- Wash by hand in warm, soapy water after each use. Avoid soaking, just dip and gently scrub.
- Rinse thoroughly until all soap residue is gone.
- Shape the bag back into its open cone shape.
- Hang bags upside down or place on a towel to fully air dry before storing.
- Storing damp bags can breed bacteria and mold.
Nylon Pastry Bags
- Simple to wash by hand or in the dishwasher. Air dry completely.
- Avoid high heat when washing as it can damage the material over time.
Piping Tips
- Wash tips immediately after using as leftover frosting can dry inside the openings.
- Use a small brush dipped in warm, soapy water to gently clean.
- Rinse tips well until water runs clear.
- Allow to air dry before storing.
Storage
- Keep pastry bags and tips in an airtight container or resealable plastic bag.
- Store in a cool, dry place like a cupboard or shelf.
With proper care, quality pastry bags and tips will last for years of cake decorating and baked creations. Keeping them clean prevents odors, clogs, and food contamination.
Decorating Cupcakes, Cookies, and More
Cupcakes, sugar cookies, and other small treats are perfect for decorating with pastry bags too! Follow these tips:
Cupcakes
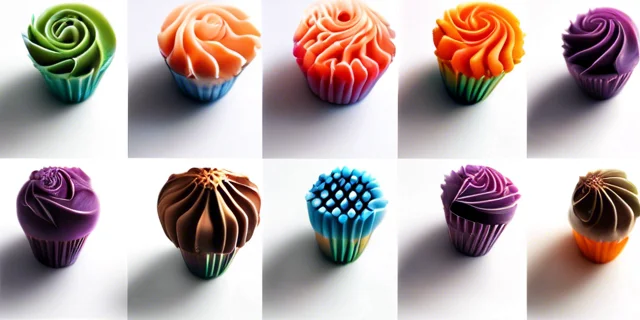
- Pipe swirled frosting on top for a pretty finish.
- Decorate with piped flowers, dots, and accents around the edges.
- Switch between piping tip colors and styles to add variety across your cupcakes.
- Use pearlized dragees, sprinkles, or other candies to decorate too.
Sugar Cookies
- Outline cookie edges with a round tip before flooding the center with frosting.
- Draw shapes, zigzags, polka dots, stripes, and more with different tips.
- Pipe one cookie design on each cookie, or make them different!
- Finish off with rainbow sprinkles for fun.
Pastries
- Accent cream puffs and eclairs with piped stripes, dots, and zigzags.
- Decorate pies with lattice or pearl borders piped along the crust edge.
- Top off cheesecakes with stylized star, shell, or floral designs.
Pastry bags aren’t just for cakes! Cupcakes, cookies, and other treats also look fabulous decorated with piped frosting. The options are endless.
Inspiring Pastry Bag Ideas
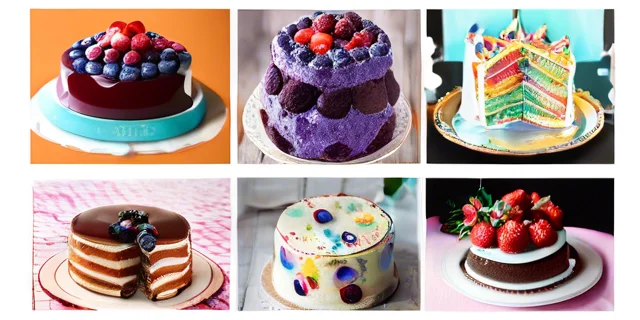
Need inspiration for decorating with pastry bags? Here are some gorgeous ways to showcase your skills:
- Elegant piped lace patterns
- Vintage floral bouquet motifs
- Watercolor drippy icing effects
- Metallic gold striped and dotted accents
- Artful painted cake toppers
- Delicate buttercream rose sprays
- Glam Marinaded Dot Trellis Style
- Botanical leaf and vine garlands
- Whimsical rainbow swirl frosting
- Rustic striped or chevron sides
- Classic vintage carnation flowers
- Chic black and white geometrics
- Modern feathered ombre patterns
- Sophisticated pearl or jeweled borders
Check out cake and decorating blogs, Instagram, Pinterest, and YouTube for endless ideas on pastry bag creativity.
With the right inspiration there are so many ways to decorate amazing cakes at home. Pastry bags make it easy to go from simple to sensational!
Key Takeaways
- Well-prepared pastry bags with correctly cut openings are the starting point for success. Take time to cut the tip neatly to desired size.
- Only fill bags halfway or less; leave ample room at the top for twisting or sealing so you can grip the bag easily.
- Match pastry tips to decorating needs like flowers, borders, writing, textures, etc. Practice key techniques on parchment first.
- Apply controlled, even pressure and keep the bag steady as you pipe. Move your whole arm, not just your wrist.
- Refrigerate iced cakes while decorating and have chilled backup frosting ready to refill bags as needed.
- Carefully wash and thoroughly dry reusable pastry bags and tips after each use for longevity. Store properly.
- Have fun while practicing new designs! Pastry bags allow you to unlock your creativity and make stunning cakes with flair.
Equipped with the right supplies and skills, you can now look forward to creating beautiful, artistic cakes to impress friends and family using pastry bags and tips. Enjoy exploring the wonderful world of cake decorating!
As an Amazon Associate I earn from qualifying purchases.